HOW TO APPLY & REMOVE

The Cox Studio Adhesive Options
Sticky Tabs – Provide 1-3 days of wear. Ideal for short-term use such as events, outfit or theme coordination, or when you prefer not to commit to long-term wear. Suitable for those whose lifestyle, work environment, personal or religious practices require flexibility. Easily removable and perfect for reusing your set frequently.
Makartt Nail Glue – Offers a medium hold lasting from 5 days to up to 14 days. Achieving maximum wear requires following each application step carefully. Proper nail preparation ensures a strong bond and long-lasting results, while inadequate prep, air bubbles, or mishandling can cause earlier lifting.
Do not attempt to remove before 5 days of wear, as this may damage your natural nails.
SOFbond™ Glue – An advanced air-dry adhesive with a gel-like texture that delivers an exceptionally strong and durable hold. With proper preparation, wear time can extend to 2-4 weeks. The formula is designed to minimise lifting, keep your nails securely in place, and maintain a salon-quality finish for the entire wear period. For best results, we recommend removing and reapplying your The Cox Studio nails every 2 weeks to refresh the application and preserve their flawless appearance.
Do not attempt to remove before 7 days of wear, as this may damage your natural nails.
If any nails lift or pop off within five days of application, please be advised this typically indicates an error in the initial preparation or application process. Achieving proper adhesion requires following all instructions precisely and ensuring no air bubbles are trapped, which should prevent premature lifting. If you have reviewed the application guidelines and the issue persists, please contact us for further assistance.
Adhesive Safety Disclaimer
For your safety, only use adhesives specifically formulated for nail application. The Cox Studio does not recommend, support, or take responsibility for the use of superglue or any non–nail adhesive, as these products can cause chemical burns, severe skin reactions, and permanent damage to the natural nail.
Regardless of the nail glue brand you choose – including glues you have used before – you must perform a patch test at least 24–48 hours prior to application. Sensitivity can develop over time, and a product that was previously well-tolerated may still trigger a reaction.
To patch test safely, apply one nail only using a small amount of adhesive and wear it for 24–48 hours. Monitor for any redness, heat, itching, swelling, discomfort or irritation around the nail area. If any reaction occurs, remove immediately and do not continue use.
HOW TO REMOVE
• Soak your nails in hot water with dish soap and oil for 15-30 minutes.
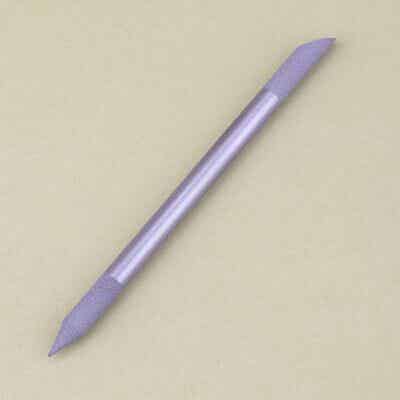
• Gently lift around the edges with a cuticle stick.
• If they don’t come off easily, soak a bit longer.
• If you applied with glue, do not attempt removal before 7 days—you can damage your nail beds.
• Never force or pull them off.
• Proper removal is essential for the health of your natural nails.
• Once removed, wash your hands and apply cuticle oil to nourish and restore your nails.
• Sometimes glue can remain inside gel nail tips, but it can be easily removed. For best results, use an electric nail file or a glue scraper, both available on my website. These tools make it simple to clean the inside of your gel tips, leaving them perfectly prepared for their next wear.
APPLICATION PRO TIPS
• Make sure your nails and cuticles are clean.
• Push back your cuticles and remove all oil and buildup around the nail area—this is essential to avoid lifting or fall-offs.
• Ensure your hands are completely dry. Water molecules can interfere with adhesion, so avoid washing your hands right before application.
• Do not use creams or oils 2 hours before and 2 hours after applying the nails.
• Prep one hand at a time. Once nails are clean and dehydrated, apply immediately—don’t touch them again, or you’ll transfer oil and dirt.
• For short wear (like a weekend), use the sticky tabs included.
• For medium hold (5–14 days), use Makartt glue.
• For strong hold (2–4 weeks), use SOFbond™ glue
• If your nails are oily, use a nail dehydrator before applying.
Proper prep = strong, long-lasting nails!
MAINTENANCE
The Cox Studio luxury gel nails are made to last. Crafted with high-quality materials, they’re durable and reusable*—but how you care for them makes all the difference.
Treat them like jewels, not tools. While strong and unlikely to break, they can still become damaged or pop off if you use them to open things or hit them against hard surfaces.
Apply cuticle oil daily. Moisturised cuticles help prevent lifting and keep your nails secure for longer wear.
Always wear gloves when cleaning. Dish soap and household chemicals are harsh—not just on your nail enhancements, but on your natural nails and skin too.
After removal, clean your nails and store them safely. With proper care, they can be reused many times—and even last over a year. That part is up to you.
*Client reports indicate that sets are commonly reused up to 5 times when applied with glue, with each wear lasting approximately 2 weeks. For occasional wear with adhesive tabs, sets have been reported to remain wearable for over one year. Results may vary depending on application, care, and individual nail conditions.


